Hello, lovelies! Another year and another Valentine's Day! Some of you may be excited because you have plans with your significant other or with friends, or you may think this is the lamest day of the year. Regardless, you can always look fab! If you're interested in a versatile makeup look, keep reading! Enjoy!
FACE
As usual, I began by priming my face with my Benefit POREfessional Primer.
I'm sure you'll notice that not much has changed with my foundation routine. I'm still using Nars Sheer Glow Foundation in Gobi, and I applied that with a Sigma 3DHD Kabuki Brush.
To cover up my dark circles, I use the Trish McEvoy Instant Eye Lift in Shade 1. This is a great color corrector to brighten under the eyes and prep the eyes for eye shadow. I apply this to my face using the doe foot applicator and then blend using a combination of a Sigma 3DHD Precision Brush.
As for the rest of my blemishes, I use Covergirl Ready Set Gorgeous Concealer in Light.I put this around my nose where I tend to have some redness, and down the bridge of my nose, forehead, and chin for a highlight and blend with my RC Cosmetics Concealer Brush.
To set the base, I use Rimmel Stay Matte Pressed Powder in Transparent. I focus this under my eyes and around my nose but dust a light layer around the rest of my face using a Real Techniques Bold Metals 300 Tapered Blush Brush.
BROWS
My brow routine is and probably always will be the same because it's fool-proof! Starting off with my Too Faced Brow Envy Kit, I apply the wax to make my brow hairs lay where I want them. Then, using a Zoeva 322 Brow Line Brush, I lightly fill in the sparse areas of my brow. I follow this powder shading with my Benefit Gimme Brow in Medium/Deep.
EYES
This is probably the most exciting part of the look for me. Using mostly the Urban Decay Naked 2 Palette and brushes from the Zoeva Rose Golden Complete Eye Set, this is a very sultry, smokey eye that also has a girly, glittery twist. It is neutral as well and will work with multiple lip colors, which I'll show you later.
To begin, I take Tease (a matte brown shade) on a Real Techniques Domed Shadow Brush and blend in the outer two-thirds of the crease. This will be our transition color so blending will be made easier.
Next, take Busted (a shimmery dark brown) on a Zoeva 228 Luxe Crease Brush and place in the outer third of the crease and in the outer V. This will create a deeper more smokey look. Apply small amounts at a time: it's a lot easier to add dark colors than take away.
I then took a clean Zoeva 224 Luxe Defined Brush to blend just the edges around Busted to create a softer finish. I did that pattern a couple more times until I was happy with the depth and darkness of my crease.
I then patted a few thick layers of YDK (a metallic goldy-bronze shade ) on a damp RC Cosmetics Flat Shader Brush. I dampened the brush with my Urban Decay All Nighter Makeup Setting Spray to make the eyeshadow really stick to my eyes and show up as shimmery as possible. I applied this over the entire lid, doing my best to avoid the crease.
I then took a deep purple shade from an old e.l.f. palette I had laying around with the same brush I used to apply Busted and applied that in the crease. It was sort of a last minute thing to add a little bit of a plummy color, but it made the look a bit more feminine and Valentines-y! This look will look good even if you don't add a purple or other shade, I just wanted to add something subtle.
To smoke out the bottom, I mixed the deep purple and Busted on a Zoeva 230 Luxe Pencil Brush and swiped that along the outer two-thirds of my lower lash line.
For the last bit of shadow, I used Bootycall (a matte pale shade) to highlight my inner corner and my brow bone.
To finish the eyes, I tight lined using Maybelline Define-A-Line Eyeliner in Brownish Black because I think this is easier than using liquid eyeliner (which most would disagree). Feel free to do a cat eye, I just think this looks best on me. Then I brushed on a few layers of Benefit BADgal Lash on both my top and bottom lashes.
CHEEKS
Coming back to the face, I applied Too Faced Milk Chocolate Soleil in Light Medium with a Real Techniques Bold Metals 301 Flat Contour Brush to define my chubby cheeks and to add some color to my forehead and temples.
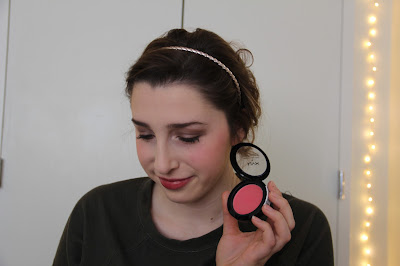
To add a little more pink to this Valentine's Day look, I used my NYX Rouge Cream Blush in Glow, and I applied this with a Real Techniques Multitask Brush.
For a little glow, I used my handy Physicians Formula Powder Highlight in Translucent Pearl. I used the Real Techniques Bold Metals 300 Tapered Blush Brush to apply this on the tops of my cheekbones, down the bridge of my nose, and my cupids bow.
LIPS
This is the part where you can make this look a little more personalized. I tried to make this look girly and cute, but here's your chance to create a soft nude lip or a bold matte red lip... It's all up to you.
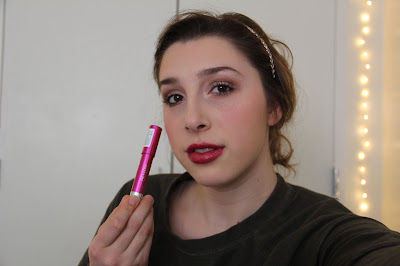
Just for reference, I tried 4 different lip colors so you could see what they look like with this brown and metallic eye.
Don't worry too much, though.
If you have a special someone this Valentine's Day, it'll come off sooner or later!
 |
| Tanya Burr Cosmetics Lip Gloss - Macaroon |
 |
| Revlon Colorburst Laquer Balm - 115 Whimsical |
 |
| Revlon Colorburst Laquer Balm - Provacateur |
 |
| Rimmel London Kate Moss Lipstick - 107 |
I hope you enjoyed this tutorial! If you want to see an alternative tutorial, click here! Let me know what your plans are for Valentine's Day in the comments!
♡♡♡
xx Amanda
Twitter & Instagram: @amanda_wymore


