Thursday, July 31, 2014

The Four "UPs" to Clearer Skin

     Hello, lovlies! Is your face cleanser not reducing those pesky spots? Do you still have random outbursts of acne? I have a few tricks to share with you that can change the look of your skin. I guess you could call them the "UPs" to clearing your skin. God, I'm clever. I'm making that the title. Okay, here you go. Enjoy!


Drink UP
     Drinking water sounds easy enough, right? We use water to clean our body on the outside, so why shouldn't we use it to clean our insides? Cleansing the body internally helps rid ourselves of unneeded bacteria and other toxins that cause unhealthy skin.

Lather UP
     Moisturizing makes a huge difference to the way your skin looks as well. Facially, it works to prevent dry and itchy skin. Some also have additional benefits such as anti-aging and SPF. As for the rest of the body, I suggest getting a body butter that contains aloe-vera to help with dry skin. Applying regularly will lead you down a road to beautiful, glowing skin.

Cover UP
     Summer is a great time to take advantage of relaxing and catching some rays, but if you go out into that kind of environment without the right protection, it can be hazardous to your skin (and your health). The rays are at their strongest point between 11:00 am - 3:00 pm. Don't get me wrong, go lay out, get some Vitamin D, just stay covered! Use at least SPF 30. Avoid tanning oils and low SPFs, they're useless.

Eat UP
     Yes, what you eat can change the way your skin looks. Avoid foods with excessive sugars, oils, and fats. Poultry, fish, and the occasional red meat are good sources of protein--eat as a "main meal". Fruits and vegetables are high in vitamins so eat those for snacks and sides of meals. Try gluten-free and dairy-free products. They're just as delicious as the "original" and there is no guilt involved. Find alternatives to unhealthy foods: coconut oil in place of butter, almond flour for all-purpose flour, quinoa for rice.
     ***Note for the ladies: Avoid consumption of alcohol and dairy during "that time of the month". The alcohol and the bacteria from the dairy can induce massive (and unneeded) breakouts. 

     What do you do that helps to prevent breakouts? Share your tips in the comments! I hope you all have a fabulous weekend! Until next time...

xx Amanda
Twitter & Instagram: @amanda_wymore

Tuesday, July 29, 2014

The Beauty of Coconut Oil


     Hello, lovely readers! How are your shining faces? Good?! Great?! Fantastic?! I hope all of the above. Today, I'm going to explain (and probably over-emphasize) the importance of coconut oil. Coconut oil is such a versatile product; we need to take advantage of it in every aspect as much as possible. Trust me, it's not just used for cooking. 

Here are 10 ways to use coconut oil for your beauty regimen:

1. Face Mask/Wrinkle Reducer
     Sick of face masks only having a temporary effect? A coconut oil face mask will have longer lasting results. Your skin will no longer have bumps and acne scars and will be moisturized, which means soft skin! Plus, rubbing a bit under the eyes each night before bed will reduce wrinkles! Amazing!

2. Hair Treatment
     I'm sure you all thought of this one. Coconut oil is often used in hair masks to strengthen and lengthen the hair and also reduce split ends. Just cover your hair, root to tip, in coconut oil; let sit 30-60 minutes; shampoo and condition as normal.

3. Hand/Body Lotion
     I know, right? You'd think this stuff would be greasy and hard to work with. Nope! This all natural moisturizer is a one-way trip to soft and touchable skin. It may take slightly longer to dry, but it is not sticky, and the little extra wait is worth it when you feel, in a matter of minutes, your skin transform into a soft and glowing piece of art across your body. Lather up!

4. Lip Balm
     I do this every night! Just rub coconut oil onto your lips (as you would a ChapStick). Your lips feel soft without all the peeling and no dryness! It's a miracle! 

5. Lip Scrub
     This sort of ties in with #4. If the "lip balm" doesn't always cut it for you, try making a scrub. It has the same effect with a little extra kick! Scrubs are great because they exfoliate and taste yummy at the same time.

6. Teeth Whitener
     Swish a bit of coconut oil in your mouth and rinse with warm water. After a few days, you'll see how much whiter your teeth look. Plus, your teeth won't feel sensitive as it would if you were to use a commercial teeth whitener or going to the dentist.

7. Make Up Remover
     Are you amazed? I like doing this when I wear a lot of eye make up on a night out. Put a bit (you don't need a lot) of coconut oil on a cotton pad or a tissue and rub gently across your eyes. 

8. Eyelash Treatment
     Remember how I said coconut oil helps strengthen and lengthen hair? This applies to ALL hair, even eyelashes. To apply, you can just rub coconut oil across your lash line (top & bottom) with your finger. I typically use a spool (eyelash/eyebrow comb) after I do this to separate my lashes and to make sure they are coated evenly. I even wear this look out on occasion--it's a great substitute for mascara!

9. Deodorant
     I know this sounds somewhat strange since most of us are accustomed to commercial deodorant, but this will help soften your underarms and get rid of those nasty razor bumps.

10. Shaving Cream
     Replacing shaving cream with coconut oil can intensify the softness of your legs. For those of you who shave your legs twice to achieve the greatest amount of softness, need no more! I definitely recommend this step because you won't be able to stop touching your legs, and there's a lot less work involved. 

     There you have it! Hope this helps! Would you like a blog post about one (or more) of these ways to use coconut oil in your beauty routine? I'd be happy to do tutorials! What do you use coconut oil for? Let me know in the comments!

xx Amanda
Twitter & Instagram: @amanda_wymore

Thursday, July 24, 2014

DIY Blackhead Removal Remedy


     Hey there readers! How've you been doing? I hope alright! Well, for you today, I have tried a DIY Blackhead Removal Remedy. This should help lessen your blackheads and hopefully make your skin feel a lot smoother. Let's begin!

What You'll Need:
  • 2 tsp Salt
  • 2 tsp Baking Soda
  • 1/2 a Lemon (juice)
  • 1 tbsp Honey
  • Flower pedals, rosemary, or mint (add for a nicer scent)


What To Do:
  • Mix ingredients until you get a bubbly paste. (Yes, science!)
  • Put concoction in hands and rub all over problem areas in circular motions. 
  • Let sit for 1-2 minutes. (Have yourself a selfie party while you wait!)
  • Rinse off with warm water; exfoliate with damp wash cloth.


     Hope this does the trick for ya! If you don't see results within the first use, don't give up! It may take a few trials to get what you're looking for! Let me know what you do to remove blackheads in the comments!

xx Amanda
Twitter & Instagram: @amanda_wymore

Tuesday, July 22, 2014

How To Clean Your Make Up Brushes


     Howdy y'all! Today, I'm going to teach you how to clean your make up brushes. Yes, such a tedious chore for those of us that have way too many other things to think about. Yet, it is something very important that can change the way our make up looks and even the way our skin looks. 


What You'll Need: 
  • Dirty Make Up Brushes
  • Shampoo
    • I use Suave Professionsals: Almond & Shea Butter Shampoo because it cleans and protects damaged hairs, but any shampoo or antibacterial soap will do.
  • Bowl
  • Towel
  • Water
What To Do:
  • Pump a shot of shampoo into the bowl.
  • Take one of your dirty brushes and put it under warm water.
  • Gently swirl brush in shampoo (it helps to swirl it in your hand too) and rinse.
  • Clean bowl and put more shampoo in for each brush. You won't want to put make up back onto a brush or spread bacteria!
  • Lay on it's side on clean hand towel.
    • The trick is to NOT set your brushes upright directly after cleaning them. If water is allowed within the ferrule (the metal part that holds the fibers), it can allow the ferrule to detach from the brush's handle.

***Note: If you are in a hurry and in need of a quick cleaning, put rubbing alcohol in a spray bottle. Spray dirty brushes. Wipe gently with rag.
     
     And there ya have it! I try to clean my brushes once a week, but sometimes, it's closer to once a month. Oops! Cleaning your brushes can help prevent unwanted acne and other skin problems. Help your skin by doing this one little thing! It might give you an unbelievable and unexpected change. Plus, your make up applies much more precise with no unwanted discoloration when brushes are cleaned frequently.

     I hope this helps you all! How do you clean your brushes? Do you have any tips or tricks to help me with cleaning my brushes? Let me know in the comments!


xx Amanda
Twitter & Instagram: @amanda_wymore

Thursday, July 17, 2014

Green Smoothie Recipe

     Good evening, friends! I had a loooooong day at the pool; I'm not exaggerating. After a miserable, and quite sweaty day, I decided to treat myself with a green (fruit) smoothie. It's so delicious, and it's super jam-packed with vitamins and amazing-ness (yep, super scientific) that our bodies love! Let's begin in 3... 2... 1... blast off! Sorry, I'm a dork. Let's just move forward.


     Okay, ladies and gents. I'm guessing you want to know what to put in an extraordinary smoothie such as the one I just explained above. Well... I'm not going to tell you! JUST KIDDING!

Ingredients & Materials:
  • 3-4 handfuls of fruit 
    • I used strawberries, pineapple, mango, and peaches
    • Typically, I'd suggest using fresh fruit, but I'm a poor college kid, so I used frozen fruit
  • 1 handful of spinach/kale
    • Spinach helps prevent inflammatory problems, oxidative stress-related problems, cardiovascular problems, and cancers
    • Kale has an excellent richness of nutrients
  • 3/4 cup of milk
    • I used Silk Almond Milk because, unfortunately, I'm lactose intolerant, plus it is better for you because there is no bacteria which is found in regular dairy milk. 
  • 1/2 cup water
    • Water is water, need I explain more?
  • 1 tbsp Chia Seeds
    • Chia Seeds are a concentrated food that contains healthy omega-3 fatty acids, carbohydrates, protein, fiber, antioxidants, and calcium
    • This blender works miracles! Unlike most blenders, this sucker gets the job done efficiently. Check out the link for details about each blender in the professional series.

     Now that you have a good idea of what to put in a divine fruit smoothie, you can just throw it all in your blender and start flipping switches and turning dials: whatever makes your ingredients blend to perfection.


     The Vitamix also works really well with frozen fruit. I struggle getting frozen fruit or ice cubes to break down because they always (somehow) end up at the top. There is an accessory that is provided with your Vitamix that helps to maneuver the fruit down to the blade. It's extra useful for those who are impatient and want their smoothie ASAP!


     ***WARNING: Do not dump your smoothie all out at once. If needed, take a spoon to guide your smoothie into your cup. Don't be an Amanda and manage this. 
     ***Note: Don't let the color fool you. It's just your spinach/kale trying to get some credit.

Cheers!
     It's okay! I got a new (not as fancy) cup to display my delicious and nutritious smoothie! I hope this helps you all realize that something as simple as a smoothie can impact your health in a large way. Let me know if you'd like more recipes like this in the future! I hope you all have a fantastic weekend!

xx Amanda
Twitter & Instagram: @amanda_wymore

Tuesday, July 15, 2014

Starting Fresh


I apologize for that disgusting coffee mug stain on my bathroom counter. Sometimes a girl just needs a little "wake me up" in the morning.

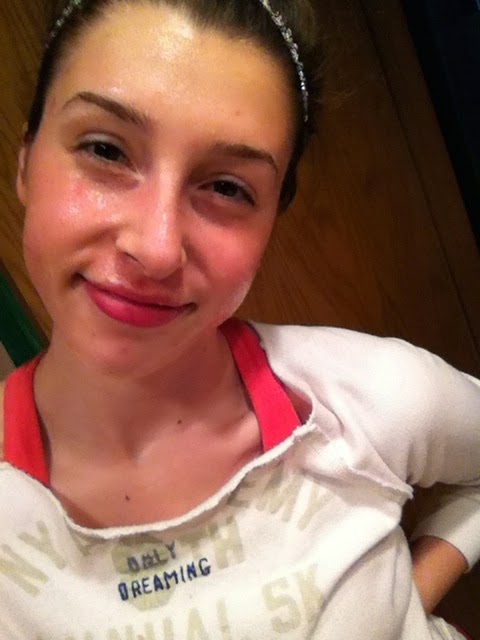
     Good afternoon, Good day, How are your lovely faces? I hope they are soft to the touch, and glowing at all times! To start off this little blog thing we have going on here, I thought I would start by showing your pretty little faces what I use and recommend for a scrub, cleanser, spot treatment, and moisturizers. LET'S BEGIN, SHALL WE?!

Materials:
  • Neutrogena Naturals: Acne Foaming Scrub
  • Neutrogena Naturals: Acne Cream Cleanser
  • Neutrogena Naturals: Acne Spot Treatment
  • Aveeno Active Naturals: Ultra-Calming Daily Moisturizer (SPF 15)
  • Aveeno Active Naturals: Smart Essentials Nighttime Moisture Infusion (Vitamin A,C, & E)
  • Water
  • Antibacterial Soap
  • Wash Cloth
  • Hand Towel
  • Q-tips
***NOTICE: I am in no way requiring you, the reader, to use the exact products I am using. These are only suggestions. If you have other products, feel free to use them. If you find these products work well too, let me know in the comments!


Step 1: Wash your hands...
     thoroughly with antibacterial soap and water. This will help to reduce the amount of bacteria you spread on your face.

Step 2: Splash your face... 
     with warm water. When I say "splash", don't take it literally and throw two handfuls of water at your face... you're going to make a mess; and I can assure you, you're not going to want to clean it up. To avoid a sopping mess, put your face towards the sink and take the warm water and gently wet down your face by using a light rubbing motion (circular towards center of face to reduce stretching and wrinkling face). 

Step 3: Time for a scrubbing...
     Squeeze about a nickel-sized amount of Neutrogena Naturals: Acne Foaming Scrub onto your finger tips. Rub finger tips together. Spread scrub onto face and neck. Please don't neglect your neck! It's the same thing as if you bronze your face, you have to bronze your neck to match. Why have a youthful face if your neck looks as if an 80 year old woman swapped her neck for yours? Just keep that in mind. Leave on for about a minute, wet wash cloth with warm water, and rub off GENTLY! Be soft, but efficient. 
     *Note: I suggest using a scrub that treats and prevents breakouts. This will reassure you that the scrub is helping your face get rid of any acne that you have, and will prevent future acne from appearing. I also only recommend using a scrub 2-3 times a week. It's just a nice treat to get rid of any extra dirt/oil/dead skin that your cleanser won't be able to remove.

Step 4: Time to cleanse the soul... or face...
     Is your face starting to feel smooth yet? It should be! The next step is to put on a cleanser. I suggest putting about a dime-sized amount onto your fingertips and gently massaging into the face... and neck. Leave on for a minute, use warm water to remove. PAT FACE DRY WITH CLEAN HAND TOWEL.
     *Note: I love using this cleanser from Neutrogena because it is "fortified" with Wintergreen leaf derived acne-fighting bionutrient for clear, healthy-looking skin. It feels so refreshing in the morning when there is a slight cooling sensation occurring on your face, plus it smells delicious!

Step 5: Treating problem spots like a boss...
     Now that your face is dry, it should be glowing, like a Christmas tree. Sorry, that was a bit dramatic, and I probably shouldn't be mentioning Christmas in the middle of July. Oops! Continuing on, I then put a small dot of Acne Spot Treatment on one side of a clean Q-tip (never use your fingers)! Dot, don't rub, onto the spots you desire to treat. 
     *Note: If you desire more product, use the other side of the Q-tip or get a new one. Once you touch the Q-tip to the problem spot, it is considered "infected". You will be picking up bacteria from your spot and putting it on the opening of the tube. Now the tube is infected! Do you see what you did now?! Keep this in mind when doing your make up as well.

Step 6: Moisturizing is a must...
     If you haven't noticed in my photos, I have two moisturizers. Now I know what you're thinking, "Amanda! No one needs two moisturizers!" Well I do. You want to know why? I'll tell you why! The first moisturizer, Aveeno Active Naturals: Ultra-Calming Daily Moisturizer, is what I use in the morning to give me a glowing effect. It is also nice that it has a bit of sun protectant in it, which helps considering I work at a pool six days a week. The second moisturizer, Aveeno Active Naturals: Smart Essentials Nighttime Moisture Infusion, is used at night. I know it sounds a bit ridiculous to use two separate moisturizers, but I can assure you, it's worth it! 

     Yes, guys...girls... whoever is reading this, I realize that was a bit lengthy and a bit repetitive, but I just want to reassure myself you are taking good care of your skin and taking the right precautions. Keep in mind, these products might not be compatible with your skin type. I have quite dry skin, and I feel that these work best.

Let me know what you like, don't like about this blog! What would you like to read about? 
Love you, invisible audience.

xx Amanda
Twitter & Instagram: @amanda_wymore

Sunday, July 13, 2014

The Newest Beauty/Health Blogger on the Block

Hello World


I’m a new blogger. I’m about to take a step in a new direction… college.
The Intended Major: Pre-medical student ... I'm that aspiring dermatologist awaiting 8-12 years of schooling... Yippie!
The reason I’m starting this blog is to give away my greatest tips to change y(our) lives around for the better… obviously! 
This blog will range from not only skin care, but, also include,  exercise, food, organization and work ethic—ANYTHING REALLY. I hope y’all will take the trip with me to discover a fascinating and (hopefully) easier way to become the best “you” that YOU can be… Sorry I went all corny on ya at the end there.
Trust me, I'm going to need some friends to get through this during college—I'm sure "Freshman 15" means something to you all.
xx Amanda
Twitter & Instagram: @amanda_wymore

P.S. If you're bored and reading this blog at any point, feel free to comment on things you do similarly on each of my posts, or concepts that you think work better. REMEMBER! I'm only a freshman in college; I still have a lot to learn.